
Sprucing Up
My husband says I have no shame as I surreptitiously snip buttons off clothing while thrifting at the ‘Bins’. I even have a tiny pair of (pink) scissors in my bag for such behavior. The truth is much of the clothing at the Bins is damaged, often already missing a button, stained, or torn. But if I am to be perfectly honest, not always. A friend also finds buttons for me and recently found an astonishing set of 1980s pewter penguin buttons. I wish she’d taken a photo of the top that wore those! Some fellow thrifters have commented that knowing how to sew, I can pick up cool items with torn seams, frayed hems or buttons missing, knowing I can mend them for resale. I marvel at how few people can sew on a button or darn a hole. That said, I confess that this old granny did learn a new trick recently.
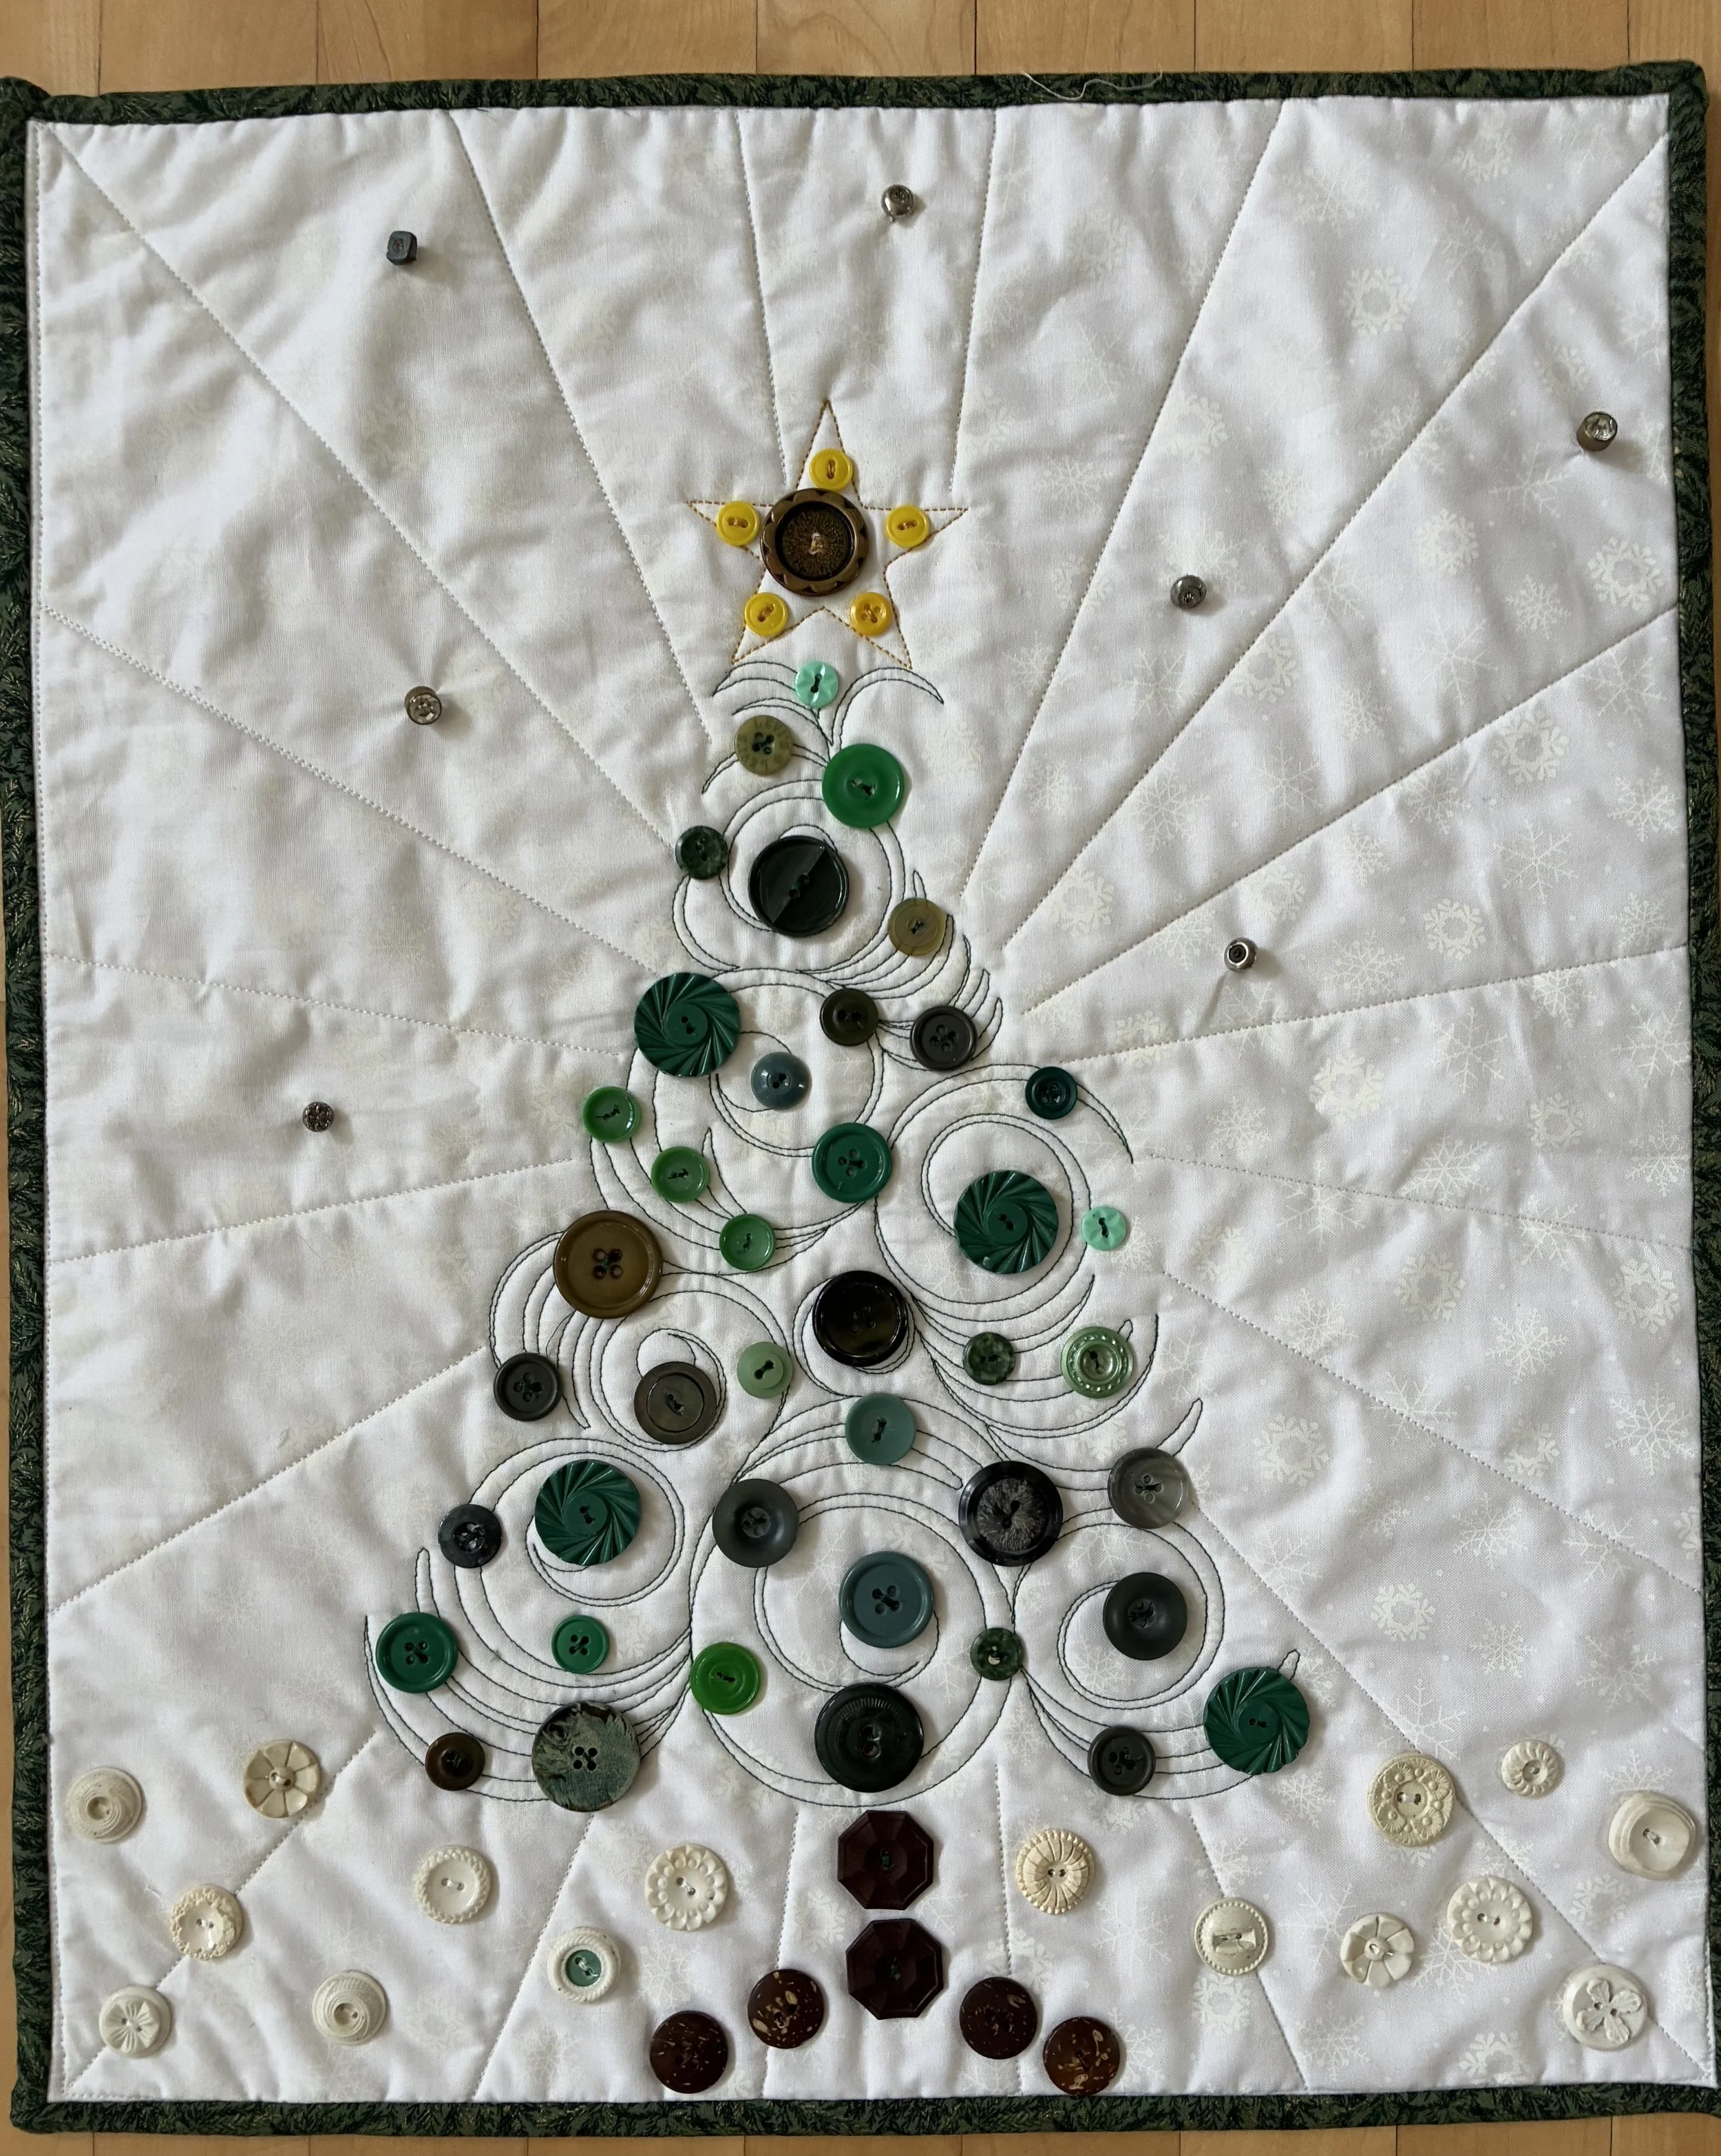
Last year my local quilt guild held a quilt show, and I was helping with the ‘Silent Auction’ fundraiser. Guild members make small quilted items for show attendees to bid on, and the auction is a great money maker. One member donated a few ‘sample quilting’ projects, and this small holiday tree was one. However, the piece needed a bit of sprucing up as it was only the quilted image on the white background. I decided to add buttons to the tree.
I have a large collection of buttons, sorted by color. I pulled out the green/blue bin and ferreted through them. Oddly, green buttons are one of the harder colors to find, and while I always keep an eye out for green clothing with buttons, my green collection is paltry. I managed a decent layout, stopped for the evening and turned out the lights. A bit later, I wandered into my sewing room to put something away, and, with no immediate lights on, glanced at the ‘buttoned’ tree. It is a very different design experience to look at things as shapes not color, and I rearranged all the buttons to ‘feel’ a bit more balanced without the lights on.
I shared a photo of the ‘work in process’ with my fellow quilter, moaning about all the buttons I had to sew on, by hand. She replied that I could sew the buttons on by machine. Say what?! I called her immediately. Hot damn was that a revelation! I have hand-sewn buttons, taught my children, and their scout troops, the same. Needle, thread, thimble, in and out, wrapping stitches, knotting underneath. It amused me to realize that, duh, machine manufactured clothing most certainly had machine sewn buttons, and I was a tad late to the game.
But now I had free reign to bling the heck out of the tree! Sewing buttons on by machine is a highly addictive process. I dug through my yellow buttons to build the star, the white to create snow and the brown bin to grow a tree trunk. The final touch was to add twinkly stars and so I pulled out my ‘metal buttons’ bin. There are some amazing ones, including my fabulous pewter penguins, but metal buttons tend to be ‘shank’ style. For the button-uneducated, there are 4 types of buttons: flat hole (think button down shirt), stud or riveted (think jeans), toggles (think pea coat ala Paddington Bear) and shank buttons. Sewing buttons on by sewing machine is easiest with a ‘flat’ style so the needle can go in and out the varying holes. Shanks come in myriad designs, but all have a finished face surface and a ‘shank’ loop on the back side for sewing. While these can be sewn by machine, it is finicky and I have not as yet mastered that skill.
While my passion is quilting, belonging to a like-minded group is a wonderful way to grow in whatever creative endeavor you enjoy. Village Quilters, a guild I have belonged to since 1992, offers me fellowship, friendship, and inspiration. My friend’s donated quilt became a fun project for me, our guild raised funds from its sale, and I learned a new trick. Who says you can’t teach an old dog new tricks? At least this dog is happily sewing buttons on thrifted treasures by machine!